How to Can Carrots Safely: Pressure Canning Guide
Short answer: yes, you can safely can carrots at home — but only in a pressure canner, using a tested recipe. Carrots are a low-acid vegetable, so a water bath canner can never get them hot enough to be shelf-safe, no matter how long you boil them. Pressure canning is the only tested home method for plain carrots, and it works beautifully: the jars come out tender, sweet, and ready for soups, stews, and side dishes all winter.
If you are new to pressure canning, start with our beginner walkthrough, Pressure Canning for Beginners: Your First Safe Batch, before you touch a jar. It explains how a pressure canner works and why venting, headspace, and altitude adjustments matter. Then come back here for the carrot-specific steps. If you are still deciding which kind of canner you need for which food, Water Bath vs Pressure Canning: Which Do You Need? sorts it out in plain language.
Why carrots must be pressure canned
Safe canning comes down to acidity. High-acid foods such as pickles and most fruits can be water bathed because their acidity helps hold back harmful bacteria. Low-acid foods — vegetables, meats, and broths — need the higher temperature that only a pressure canner reaches. Carrots fall squarely in the low-acid group, so there is no water bath shortcut, no oven method, and no "boil it longer and hope" version that makes them safe.
This is the same rule behind our guide to How to Can Green Beans Safely, another low-acid vegetable that must be pressure canned. The single most dangerous canning mistake is treating a low-acid food like a high-acid one. Botulism spores survive boiling water, and they can grow in a sealed, low-acid jar stored at room temperature. Our explainer, Botulism Risk in Home Canning: The Safety Facts Beginners Must Know, covers what is actually at stake and why tested recipes are non-negotiable. Pressure canning, done by the book, removes that risk.
What you need before you start
You do not need fancy equipment, but you do need the right equipment. A pressure canner in good working order is essential — a pressure cooker is not the same thing, and a water bath pot will not do. Check your canner's gasket, vent, and gauge before canning day, and read the manufacturer's manual for your model. If you are still shopping, Best Pressure Canner for Beginners: Presto vs All American compares the two most popular beginner options honestly.
Beyond the canner, gather pint or quart jars made for home canning, new two-piece lids, a jar lifter, a funnel, a bubble remover or thin spatula, and clean towels. Our Best Canning Kit for Beginners guide lists what is worth buying and what you can skip, and Best Canning Jars for Beginners: Sizes and Picks explains why jar size matters — it changes the tested processing time, so you cannot swap sizes freely. Never reuse a flat lid, and never can in a jar that is chipped or cracked. If you are unsure about lids, read Is It Safe to Reuse Canning Lids? first.
Choosing and preparing the carrots
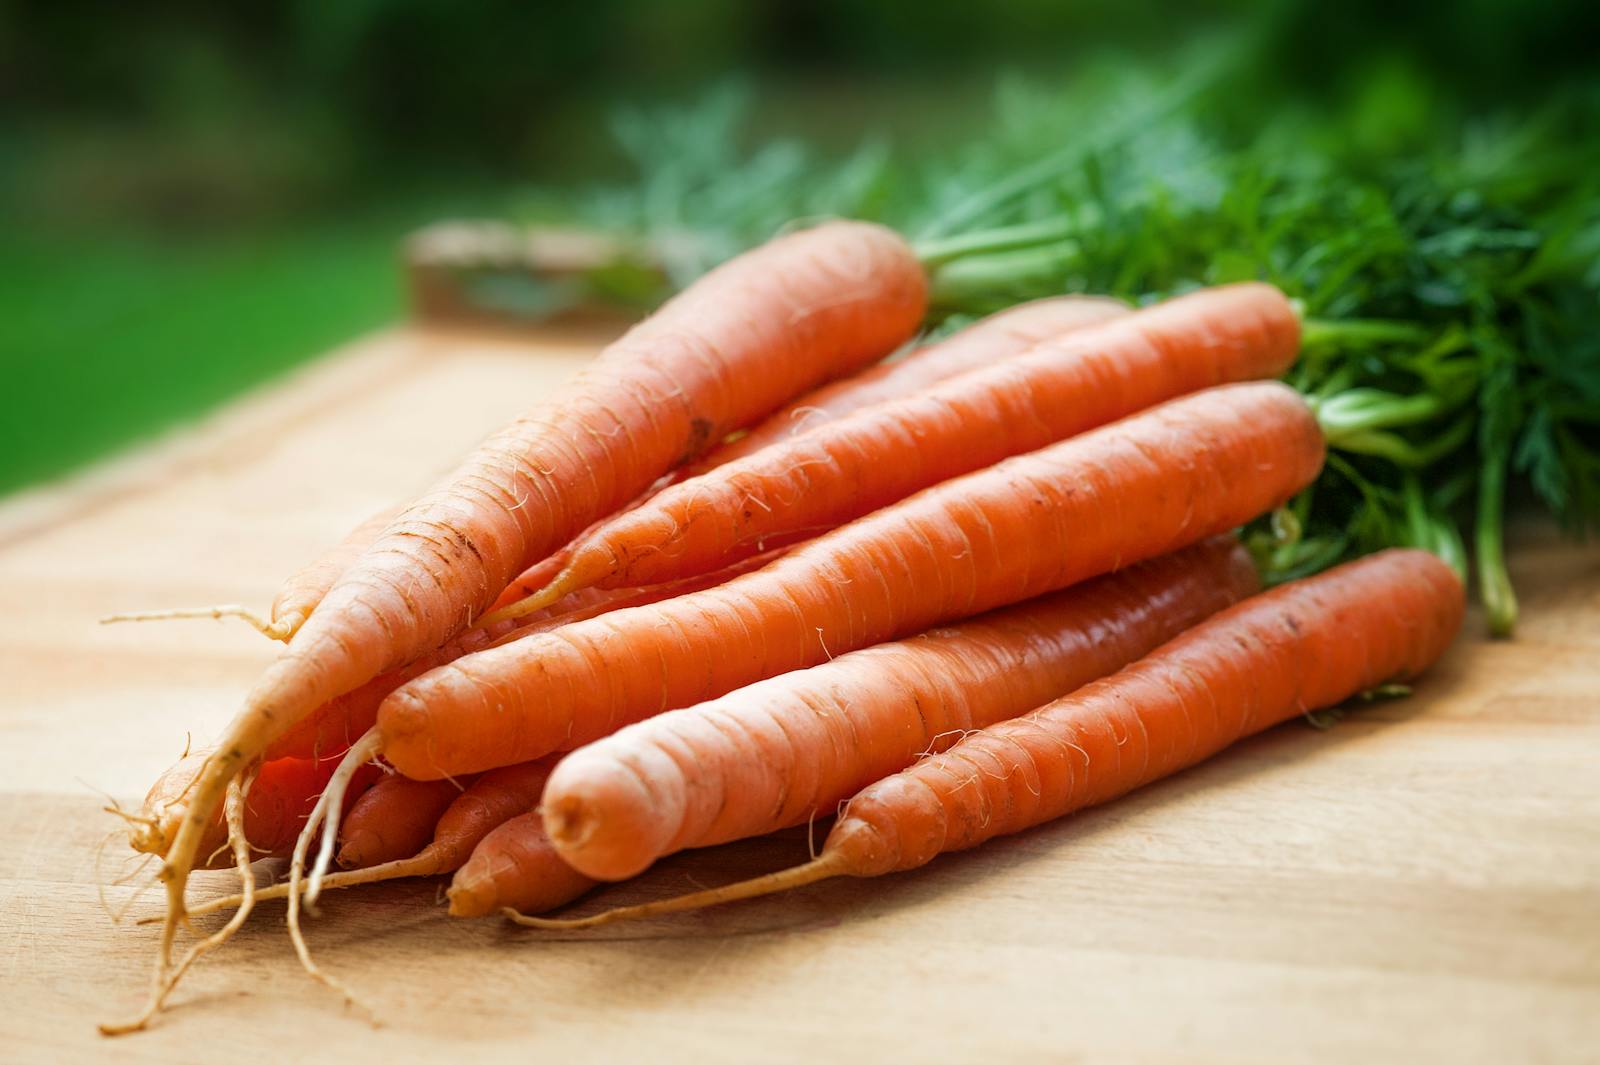
Choose firm, crisp carrots with no soft spots, cracks, or mold. Young, tender carrots can beautifully, and so do mature garden carrots — the key is freshness, not size. Avoid carrots that have gone limp in the crisper or that show decay; canning does not rescue poor-quality produce, it only preserves the quality you start with. Wash the carrots well, scrubbing off soil, then peel them. Peeling is part of tested carrot recipes, not an optional step, because soil on the skin can carry spores that heat must reach and kill.
Cut the peeled carrots into slices or coins of even thickness, or into short lengths that fit your jars. Even pieces matter more than perfect pieces: thin slices and thick chunks in the same jar will not heat evenly. Most tested recipes call for carrot pieces about 1/2 inch thick, but follow the exact cut your chosen recipe specifies rather than improvising. If you are canning a large harvest, work in batches and keep the cut carrots in clean water so they do not dry out or discolor while you prepare the jars.
Hot pack or raw pack?
Tested carrot recipes offer two packing styles. In a hot pack, you briefly boil the carrot pieces in water, then pack the hot carrots into hot jars and top up with the hot cooking liquid. In a raw pack, you pack raw carrot pieces tightly into jars and pour boiling water over them. Hot packing usually fits more carrots per jar and removes more air, which means fewer floating pieces and a better seal. Raw packing is simpler and works well for a small batch. Either method is safe only when you follow a tested recipe for that method, jar size, and altitude — the processing time is not interchangeable between the two, so pick one and follow it exactly.
Step by step: canning carrots safely
Read your tested recipe all the way through before you start, and keep it beside the stove. The outline below follows the standard USDA and National Center for Home Food Preservation (NCHFP) procedure for carrots; where your recipe gives a specific time, pressure, or headspace for your jar size and altitude, your recipe wins.
1. Prepare the jars and the canner
Wash jars, lids, and bands in hot, soapy water and rinse well. Keep the jars hot until you fill them — a cold jar plus boiling liquid is a recipe for breakage. Put the rack in the pressure canner and add the amount of water your canner manual specifies, usually a few inches. Keep the canner water simmering, not boiling hard, while you pack. Set the new flat lids aside in hot water if your lid brand recommends it; always follow the lid manufacturer's current directions, since recommendations have changed over the years.
2. Pack the jars
Pack the carrot pieces into the hot jars, leaving the headspace your tested recipe specifies. For carrots, tested recipes generally call for about 1 inch of headspace — but confirm this in your recipe rather than guessing, because headspace affects the seal. Add boiling water or the hot cooking liquid over the carrots, maintaining that headspace. Do not add butter, oil, flour, or any thickener to the jars: fats and starches slow heat penetration and can make a tested time unsafe. Salt is optional for safety — it affects flavor only, so add it only if your recipe includes it, at the amount given.
Remove air bubbles by sliding a thin, non-metal spatula or bubble remover around the inside of each jar. Air pockets insulate the food and can lead to under-processing and liquid loss, so take a few seconds per jar. Wipe each jar rim with a clean, damp cloth, checking for nicks or food on the rim. A single grain of food on the rim can break the seal, and it is the most common cause of a failed seal. Our troubleshooting guide, Why Didn't My Canning Jars Seal? 9 Causes and Fixes, covers every other culprit, from over-tightened bands to the wrong headspace.
3. Load and process the canner
Center a flat lid on each jar and screw the band on fingertip-tight — snug, but not cranked down. Bands that are too tight trap air and can buckle lids. Use the jar lifter to place jars on the canner rack, keeping them upright and not touching each other. Fasten the canner lid according to your manual, then heat the canner and vent steam exactly as the manual directs before you start timing. Venting drives air out of the canner so the temperature inside is uniform; skipping it is one of the most common beginner errors.
Once venting is complete, bring the canner to the pressure your tested recipe specifies for your altitude and jar size, and hold it there for the full processing time in that recipe. Do not guess at either number, and do not shorten the time because the carrots look done — heat must reach the center of every piece, and only the tested time guarantees that. Altitude matters: water boils at a lower temperature higher up, so recipes adjust pressure or time for altitude. Our Canning Processing Times and Altitude Chart explains how to find your adjustment, but always apply the adjustment from the tested recipe you are using. If the pressure drops below the target during processing, you must start the timing over — there is no partial credit in pressure canning.
4. Cool, check, and store
When the time is up, turn off the heat and let the canner cool and depressurize on its own. Never force-cool a pressure canner under running water or by removing the weight early; the jars need that gradual cool-down to finish processing and seal. Once the canner is fully depressurized, open the lid away from your face, lift the jars out with the lifter, and set them upright on a towel, leaving space between them. Do not tighten bands, flip jars, or press down lids during cooling — a lid that seals on its own is safe; a lid you push down is not.
After 12 to 24 hours, check every seal: the lid should be concave and should not flex when pressed. Remove the bands, lift each jar by its lid edges to confirm the seal holds, then label the jar with the contents and date. Store sealed jars in a cool, dark, dry place, and keep the bands off during storage so a failed seal is easy to spot. Any jar that did not seal goes into the refrigerator and must be eaten within a few days, or you can reprocess it within 24 hours with a new lid following the full tested procedure — but never simply re-tighten and shelve it. For storage expectations, see How Long Does Home Canned Food Last?
Mistakes that make canned carrots unsafe
Most carrot canning failures come from a handful of avoidable choices. Water bathing carrots is the first: no water bath time, however long, makes a low-acid vegetable safe. Adding cream, butter, cheese, or thickeners is the second — tested carrot recipes are plain carrots in water, and anything richer needs a different, tested recipe of its own, if one exists at all. Canning carrot puree, carrot juice, or mashed carrots is the third: dense, thick foods heat unevenly, and there is no tested home recipe for canning carrot puree. Freeze puree instead.
Other mistakes are quieter but still matter. Using an untested recipe from a blog, video, or old family notebook without checking it against a current USDA or NCHFP source is a gamble, because older recipes sometimes used shorter times or methods we now know are unsafe. Changing jar sizes, doubling a recipe into bigger jars, or packing jars tighter than the recipe allows all change how heat moves through the food. And skipping altitude adjustment is an easy miss for anyone above sea level — if you are not sure of your elevation, check it before canning day, not during.
Using your home-canned carrots
Properly canned carrots are a quiet kitchen workhorse. Drain a jar into soup or stew for the last few minutes of cooking, mash them lightly with butter and herbs for a quick side, or toss them with honey and thyme for a roast-style dish without the roasting time. Because they are already fully cooked, they need only reheating — do not boil them for a long time again or they will go soft. Always inspect a jar before opening: check the seal, look for cloudiness, swelling, off smells, or spurting liquid, and if anything seems wrong, throw the jar out without tasting. When in doubt, throw it out is not just a saying in canning; it is the rule.
Labeling matters more than it seems. A jar labeled "carrots, October 2026" is useful a year later; an unlabeled jar is a mystery you will not want to solve. Store jars out of direct light, avoid damp basements and hot garages, and use the oldest jars first. Good rotation is the difference between a pantry you trust and a shelf of guesses.
Frequently asked questions
Can I water bath carrots if I boil them for a very long time?
No. Boiling water reaches 212°F at sea level, and that temperature cannot kill botulism spores no matter how long you hold it there. Only pressure canning reaches the temperature a low-acid food needs. There is no safe water bath time for plain carrots.
Can I can carrots with other vegetables mixed in?
Only if you are following a tested recipe for that exact mixture. You cannot invent a mixed-vegetable jar by averaging times or guessing. If no tested recipe exists for your combination, can each vegetable separately by its own tested recipe, or freeze the mixture instead.
Do I have to peel carrots before canning?
Yes, tested carrot recipes call for peeled carrots. Peeling removes soil and surface contamination that heat may not fully reach, and it is part of what makes the tested time valid. Skipping the peel means you are no longer following the tested recipe.
Why did liquid leak out of my jars during processing?
Some liquid loss, called siphoning, happens when the canner cools too quickly or jars are overfilled. It does not automatically make the food unsafe if the jar sealed and the food inside was fully processed, but jars that lost a lot of liquid should be checked carefully and used sooner. Prevent it by keeping headspace correct, cooling the canner slowly, and avoiding over-tightened bands. See Why Didn't My Canning Jars Seal? for the full checklist.
How long do home-canned carrots keep?
Sealed, properly processed jars stored in a cool, dark place keep their best quality for about a year, and remain safe longer if the seal holds and storage conditions are good. Quality fades before safety does, so use older jars first and inspect every jar before opening. Details are in How Long Does Home Canned Food Last?
Carrots reward the canner who respects the rules: pressure canner, tested recipe, correct jar size, altitude adjustment, and patience during cooling. Do those five things and a humble bag of carrots becomes a pantry staple you can trust all winter.
Comments
Post a Comment
Play nice — spam and promo links are deleted.